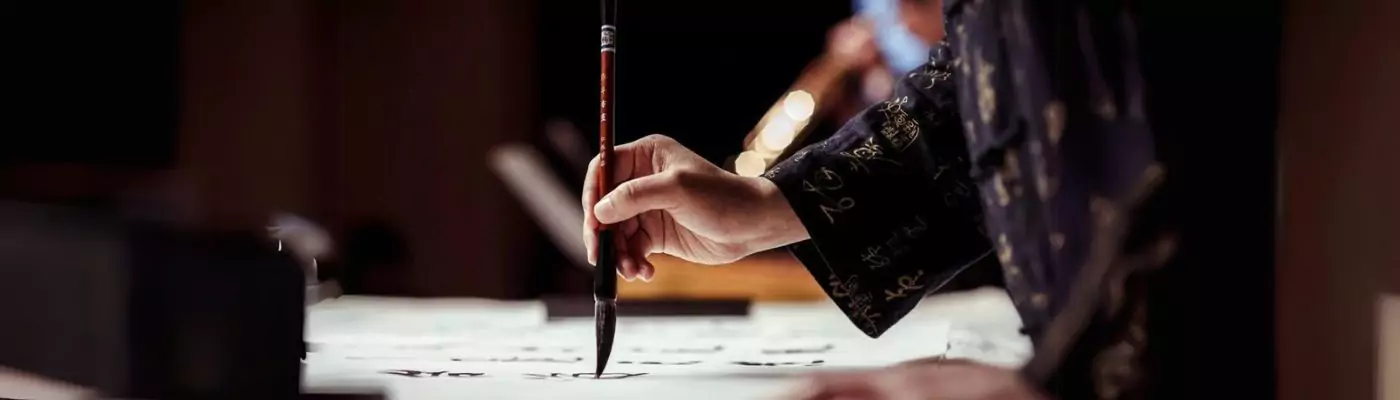

Brush Calligraphy Variations: Discover Stunning Creative Styles You Must Try
Brush calligraphy offers a world of creative possibilities with its various styles and techniques. Unlike traditional calligraphy, modern calligraphy encourages innovation and deviation. In this article, we will explore different variations of brush calligraphy and discover how you can personalize your projects with unique hand lettering styles. We will cover aspects like thickening downstrokes, using different writing instruments, experimenting with unusual inks, adding flourishes, and skipping loops and curves. Let’s unleash your creativity and dive into the world of brush calligraphy variations.
Key Takeaways:
- Brush calligraphy offers a diverse range of styles and techniques for creative expression.
- Modern calligraphy encourages innovation and allows for personalization of projects.
- Thickening downstrokes can add impact and boldness to your lettering designs.
- Experimenting with different writing instruments can create unique textures and effects.
- Using unconventional inks like coffee or watercolors can add creativity to your calligraphy.
Variation 1: Thicken Downstrokes

One popular variation in brush calligraphy is thickening downstrokes for a bolder and more impactful look. By reinforcing the downstrokes with additional strokes, you can create double the thickness and make your calligraphy stand out. This technique is especially useful for larger surfaces like posters, where you want your lettering to fill up the space and grab attention.
To achieve this effect, follow these step-by-step instructions:
- Start by drawing your letters using a brush pen or similar tool.
- Identify the downstrokes in each letter – these are the lines that naturally flow downward.
- Once you’ve identified the downstrokes, use the same brush pen or a thicker marker to trace over them, adding extra width to the lines.
- Make sure to maintain consistent pressure as you thicken the downstrokes, giving your calligraphy a uniform appearance.
- After thickening the downstrokes, let the ink dry completely before adding any additional details or embellishments.
To inspire you, here is an example of calligraphy envelopes using the thicken downstrokes technique:
“Thickening the downstrokes in my calligraphy has brought a new level of depth and impact to my lettering designs. It’s amazing how a small adjustment can make such a big difference.”
By mastering thicken downstrokes, you can elevate your creative lettering and create stunning lettering designs that demand attention. So grab your brush pen and start experimenting with this brush pen technique today!
Variation 2: Try a New Writing Instrument

Looking to add a unique touch to your brush calligraphy? One exciting variation to explore is experimenting with different writing instruments. While brush pens are commonly used in calligraphy, there are other tools like pencils and paintbrushes that can help you create distinctive lettering styles. Each writing instrument has its own characteristics, resulting in various textures and effects. Let’s dive into the world of brush calligraphy practice with different writing instruments.
1. Brush Pens: These versatile tools are specifically designed for brush calligraphy. They come in various sizes, allowing you to create both delicate and bold strokes. They are perfect for beginners and professionals alike, providing consistent ink flow and ease of use.
2. Pencils: Believe it or not, pencils can produce stunning calligraphy. They offer precise control over stroke thickness and allow for sketching and refining designs before committing to ink. With different lead hardness, you can achieve varying levels of line weight.
3. Paintbrushes: Ideal for larger projects, paintbrushes can create beautiful, expressive lettering. They offer a wider range of stroke widths and textures, allowing you to experiment with different techniques and effects. Watercolor brushes are particularly popular in calligraphy practice.
| Writing Instrument | Pros | Cons |
|---|---|---|
| Brush Pens | Easy to use Consistent ink flow Variety of sizes |
May require practice for precise control |
| Pencils | Precise control over line weight Opportunity for sketching and refining |
Smudging Lead sharpening required |
| Paintbrushes | Expressive and versatile Range of stroke widths and textures |
Requires additional tools like ink or paint |
Experimenting with different writing instruments can open up new avenues for creativity in your brush calligraphy practice. Each instrument brings its own flair and possibilities, allowing you to develop your own unique lettering style.
Whether you prefer the precision of a brush pen, the control of a pencil, or the expressive strokes of a paintbrush, there is no limit to what you can achieve with different writing instruments. Embrace the brush pen techniques and calligraphy practice with these variations and unlock a world of creativity in your lettering.
Variation 3: Write With a Crazy New Ink

To add a touch of creativity to your brush calligraphy, why not try experimenting with unconventional inks? Instead of traditional calligraphy inks, you can use coffee, watercolors, gouache, or even wine! These alternative inks can bring unique and unexpected effects to your lettering, making it stand out from the crowd.
By writing with a crazy new ink, you can infuse your brush calligraphy with a sense of adventure and playfulness. Each ink has its own characteristics, allowing you to create different textures, shades, and visual impact. Whether you prefer earthy tones, vibrant colors, or dramatic black, there’s an ink out there waiting to inspire your brush calligraphy.
Experimenting with unusual inks not only challenges your creative boundaries but also adds a personal touch to your lettering. It’s an opportunity to let your imagination run wild and create something truly unique. You never know what unexpected beauty may emerge when you pick up that coffee-stained brush or dip your pen in a pool of watercolors.
Take a look at some examples below for brush calligraphy created with unusual inks:
| Ink | Effect |
|---|---|
| Coffee | Warm and rustic, with natural variations in color |
| Watercolors | Delicate and translucent, creating a dreamy watercolor effect |
| Gouache | Opaque and vibrant, perfect for bold and solid lettering |
| Wine | Deep and rich, with subtle organic tones |
If you’re ready to dive into the world of crazy new inks, here are a few tips to get you started:
- Experiment with different types of paper to see how the ink interacts and absorbs.
- Adjust the consistency of your ink by mixing it with water or other mediums to achieve desired effects.
- Practice on scrap paper before working on your final project to get a feel for the ink and its behavior.
- Embrace imperfections and let the ink guide your brush strokes—sometimes the unexpected becomes a beautiful design element.
So go ahead, grab a bottle of coffee, a set of watercolors, or whatever alternative ink catches your eye. Let your brush dance on the paper, exploring new realms of creativity and leaving a trail of vibrant, unconventional calligraphy in its wake.
Variation 4: Add Out-of-Control Flourishes

Flourishes can add a touch of elegance and whimsy to your calligraphy. By incorporating extravagant and out-of-control flourishes, you can make your lettering more visually appealing and captivating. These artistic embellishments bring a sense of movement and personality to your lettering art.
Adding flourishes requires precise control and creative intuition. To master this technique, follow these simple steps:
- Begin with a basic letterform. Start with a clean and well-executed letter as the foundation for your flourish.
- Identify the areas where a flourish can be added. Look for spaces that have enough room for an extended stroke or loop.
- Use a lighter brushstroke to create an initial guideline for your flourish. This will help you maintain a consistent balance and flow.
- Gradually build up the size and complexity of the flourish. Experiment with different shapes, curves, and loops.
- Pay attention to the overall composition. Ensure that the flourishes enhance the lettering without overpowering it.
Remember, practice is key to achieving mastery in adding flourishes. Take inspiration from calligraphy tutorials and lettering artists who excel in this creative technique. Experiment with different styles and adapt them to your own unique lettering art.
“Flourishes bring a sense of movement and personality to your lettering art.”
Here are some resources to help you explore and develop your skills in adding flourishes:
| Resource | Description |
|---|---|
| Calligraphy Society | A community of calligraphy enthusiasts where you can find tutorials, workshops, and inspiration. |
| Lettering Daily | An online platform with tutorials, tips, and challenges for lettering artists of all levels. |
| Calligraphy Video | An Instagram account that shares mesmerizing videos of calligraphy artists creating beautiful flourishes. |
With practice and inspiration, you can take your calligraphy to the next level and create stunning lettering art with out-of-control flourishes.
Variation 5: Skip Loops, Curves, and Fluidity
To create a unique and unconventional look in your brush calligraphy, you can experiment with skipping loops, curves, and fluidity. By replacing swoops and loops with straight lines and angles, you can create a more geometric and structured aesthetic. This variation is a great option for those who want to break away from traditional feminine calligraphy styles and create a more modern and edgy look.
Examples:
Instead of looping the letter “o,” you can create a straight line with a small dot above it. This adds a contemporary touch to your calligraphy and creates a visually interesting effect.
“The straight lines and sharp angles in brush calligraphy give it a powerful, minimalist vibe that complements modern design.” – Jane Thompson, professional calligrapher
This technique works particularly well for bold lettering and can be used to write impactful quotes, headlines, or names. By eliminating loops and curves, your brush calligraphy will have a clean and structured look that stands out.
Recommended Resources:
- Online tutorials: Brush Calligraphy Skip Loops Tutorial by Hand Lettering Studio
- Practice sheets: Free Printable Worksheets for Skip Loops Calligraphy by Modern Calligraphy Supply
- Inspiration: Instagram accounts of popular calligraphers known for fluidity and angular styles
| Pros | Cons |
|---|---|
| Creates a modern and edgy aesthetic | Requires practice to maintain consistency in straight lines and angles |
| Provides a clean and structured look to your calligraphy | May not be suitable for certain letter combinations |
| Allows for experimentation with different letterforms | Requires a good understanding of basic calligraphy principles |
Conclusion
Brush calligraphy variations offer endless opportunities for creativity. By exploring different styles, techniques, writing instruments, inks, flourishes, and skipping loops, you can personalize your projects and create lettering designs that reflect your unique style. Whether you’re a beginner or an experienced calligrapher, the world of brush calligraphy variations is waiting for you to explore and unleash your creativity. So grab your brush pen and start experimenting with these exciting variations today!
FAQ
What are brush calligraphy variations?
Brush calligraphy variations refer to different styles and techniques that can be used to create unique lettering designs. These variations include thickening downstrokes, using different writing instruments, experimenting with unusual inks, adding flourishes, and skipping loops and curves.
How can I thicken downstrokes in brush calligraphy?
To thicken downstrokes in brush calligraphy, you can reinforce the initial downstrokes with additional strokes. This technique creates a bolder and more impactful look. We provide step-by-step instructions and examples of calligraphy envelopes using this variation.
What other writing instruments can I use for brush calligraphy?
While brush pens are commonly used for brush calligraphy, you can experiment with other tools like pencils and paintbrushes to create unique lettering styles. Each writing instrument has its own characteristics and can result in different textures and effects.
Can I use unconventional inks for brush calligraphy?
Yes, you can experiment with unconventional inks like coffee, watercolors, gouache, and even wine to add a touch of creativity to your brush calligraphy. These alternative inks can create unique and unexpected effects in your lettering.
How can I add flourishes to my brush calligraphy?
Flourishes can add elegance and whimsy to your calligraphy. By incorporating extravagant and out-of-control flourishes, you can make your lettering more visually appealing. We provide instructions, inspiration, and resources for learning how to add flourishes to your brush calligraphy.
Can I skip loops and curves in brush calligraphy?
Yes, you can experiment with skipping loops, curves, and fluidity in your brush calligraphy to create a unique and unconventional look. By replacing swoops and loops with straight lines and angles, you can create a more geometric and structured aesthetic.
Why should I explore brush calligraphy variations?
Brush calligraphy variations offer endless opportunities for creativity. By exploring different styles, techniques, writing instruments, inks, flourishes, and skipping loops, you can personalize your projects and create lettering designs that reflect your unique style. Whether you’re a beginner or an experienced calligrapher, the world of brush calligraphy variations is waiting for you to explore and unleash your creativity.


