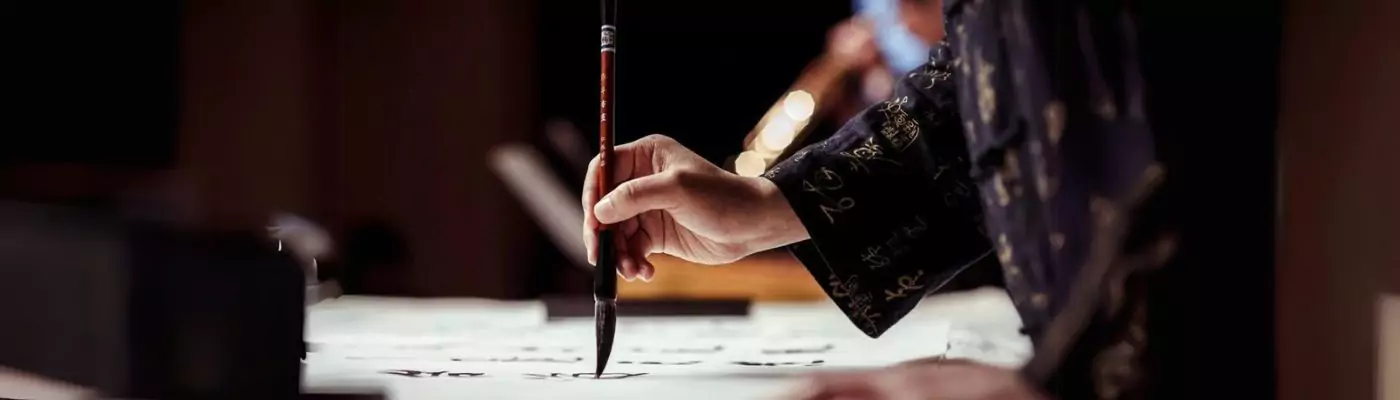

Brush Calligraphy for Intermediates: Unleash Your Next-Level Skills Now!
Welcome to the world of brush calligraphy for intermediates! If you’ve already mastered the basics and are ready to take your lettering skills to the next level, then this course is perfect for you. In Brush Calligraphy for Intermediates, you’ll learn advanced techniques and explore a variety of intermediate lettering styles that will elevate your artwork to new heights.
Throughout this course, you’ll dive deep into brush pen techniques, color blending, calligraphic shading, and more. With each lesson, you’ll gain valuable insights and hands-on practice, allowing you to create stunning brush calligraphy compositions with ease.
Whether you’re a budding artist looking to expand your artistic repertoire or a seasoned calligrapher wanting to refine your skills, Brush Calligraphy for Intermediates is the perfect opportunity to take your lettering to the next level. Get ready to unleash your creativity, experiment with different styles, and create awe-inspiring brush calligraphy artwork that will impress everyone.
Key Takeaways:
- Master advanced brush pen techniques to add depth and dimension to your lettering.
- Explore various intermediate lettering styles to create unique and visually appealing compositions.
- Learn color blending techniques to give your brush calligraphy artwork a vibrant and eye-catching look.
- Discover calligraphic shading techniques to enhance the three-dimensional effect of your lettering.
- Experiment with creating brush calligraphy on different surfaces, expanding your artistic possibilities.
Brush Pen Techniques for Intermediate Calligraphers

Once you’ve mastered the basics of brush calligraphy, it’s time to take your skills to the next level. In this section, we will explore a variety of brush pen techniques that are perfect for intermediate calligraphers. These techniques will help you add depth, dimension, and visual interest to your lettering compositions.
Stroke Weight Variation
One of the key techniques to master as an intermediate calligrapher is stroke weight variation. This technique involves applying different amounts of pressure to the brush pen to create thick and thin lines in your lettering. By varying the stroke weight, you can add a sense of depth and dimension to your words, making them more visually appealing.
| Thick Strokes | Thin Strokes |
|---|---|
| Apply more pressure to the brush pen | Apply less pressure to the brush pen |
| Creates bold, impactful lines | Creates delicate, refined lines |
| Perfect for emphasizing certain letters or words | Great for creating fine details and flourishes |
Brush Calligraphy Composition
Another essential skill for intermediate calligraphers is brush calligraphy composition. It’s not just about writing beautiful letters but also arranging them in visually appealing ways. In this section, you will learn how to create balanced and harmonious layouts for your brush calligraphy projects.
- Experiment with different alignments, such as centered, left-aligned, or right-aligned.
- Create hierarchy by varying the size and style of your lettering.
- Combine lettering with decorative elements like flourishes or illustrations.
“Composition is the art of arranging in a pleasing manner the various elements of a picture in order to tell a story or communicate an idea.” – Henri Cartier-Bresson
By applying these brush pen techniques and mastering brush calligraphy composition, you will be able to create stunning and captivating lettering projects that grab attention and make a lasting impression.
Next, we will explore the art of color blending in brush calligraphy, where we will learn how to create vibrant and eye-catching effects using a variety of colors.
Color Blending in Brush Calligraphy
Adding color to your brush calligraphy can bring your artwork to life. It allows you to create vibrant and eye-catching compositions that stand out. In this section, we will explore the art of color blending in brush calligraphy, where we will learn how to seamlessly blend colors using brush pens.
Color blending is a technique that involves combining different hues to create smooth transitions and gradients in your lettering. It adds depth and dimension to your brush calligraphy, making your artwork more visually appealing.
There are several techniques for color blending in brush calligraphy. One popular method is to use a lighter shade as the base color and then layer darker colors on top, gradually transitioning from one color to another. This creates a beautiful gradient effect that adds interest and complexity to your lettering.
Another technique is to experiment with different pressure levels and brush angles to achieve the desired color blending effect. By varying the pressure applied to the brush pen, you can create lighter or darker strokes, allowing for more control over the color blending process.
Color blending in brush calligraphy opens up a world of possibilities, allowing you to create unique and dynamic artwork. Whether you’re creating greeting cards, personalized art pieces, or adding a pop of color to your journaling, mastering color blending will take your brush calligraphy to the next level.
Mastering Calligraphic Shading

Calligraphic shading is a technique that adds depth and dimension to your brush calligraphy. By strategically applying varying pressure and ink flow, you can create a three-dimensional effect that brings your lettering to life. This section will explore different shading techniques, allowing you to enhance the overall composition of your brush calligraphy.
To begin mastering calligraphic shading, it’s important to understand the basics of light and shadow. By identifying the primary light source in your composition, you can determine where the shadows should fall. Start by practicing simple shading exercises, such as adding shadows to basic letterforms. As you gain confidence, you can progress to more intricate designs, incorporating shading into more complex compositions.
One technique commonly used in calligraphic shading is hatching. This involves creating parallel lines to simulate shadows. By varying the density and spacing of the lines, you can control the intensity of the shading. Another technique, cross-hatching, involves intersecting parallel lines to create a crosshatch pattern. This technique adds depth and texture to your shading, resulting in a more realistic and dynamic appearance.
As you continue to explore calligraphic shading, don’t be afraid to experiment and push boundaries. Try combining different shading techniques to create unique effects and textures. Additionally, consider the interplay of shading with other elements such as color blending and flourishes. By incorporating shading strategically, you can create visually captivating and harmonious brush calligraphy compositions.
Brush Calligraphy on Different Surfaces
Brush calligraphy is a versatile art form that can be applied to various surfaces beyond traditional paper. Whether you want to create personalized gifts, decorate your home, or add a unique touch to special events, knowing how to use brush calligraphy on different surfaces will expand your artistic possibilities. Let’s explore some common surfaces and the techniques required to achieve beautiful results.
Wood
When working with wood, it’s important to choose the right brush pen and ink that will adhere well to the surface. Smooth wooden surfaces, such as plywood or hardwood, are ideal for brush calligraphy. Before starting, make sure to sand the wood to create a smoother writing surface. Once you’ve prepared the wood, you can use the same techniques you’ve learned for paper, applying gentle pressure and creating thick and thin strokes. Experiment with different styles and lettering compositions to create stunning wooden signage, custom wall art, or personalized wooden gifts.
Glass
Brush calligraphy on glass can create a beautiful and elegant effect, perfect for special occasions or home decor. To write on glass, you can use markers specifically designed for glass surfaces. These markers are made with permanent ink that adheres to glass without smudging or fading. Start by cleaning the glass surface thoroughly to ensure a smooth writing experience. Then, simply apply gentle pressure and create your brush calligraphy as you would on paper. Whether you’re designing glassware, creating window displays, or adding a personal touch to mirrors, brush calligraphy on glass will add a touch of sophistication to your projects.
Fabric
Brush calligraphy on fabric opens up a whole new world of possibilities. From custom clothing to decorative pillows, fabric can be a canvas for your artistic expression. However, it’s important to choose the right tools and techniques to ensure that the ink adheres well and doesn’t bleed or fade. Fabric markers or fabric paint pens are specially designed to provide vibrant and long-lasting results on fabric. Before starting, make sure to wash and dry the fabric to remove any sizing or chemicals. Then, apply gentle pressure and create your brush calligraphy strokes on the fabric surface. Experiment with different fabrics and colors to create unique and personalized textile art.
| Surface | Recommended Tools | Techniques |
|---|---|---|
| Wood | Brush pen, Ink, Smooth wooden surface | Create thick and thin strokes, Experiment with different styles and compositions |
| Glass | Glass markers or paint pens | Clean glass surface, Apply gentle pressure, Create brush calligraphy as usual |
| Fabric | Fabric markers or fabric paint pens | Wash fabric, Apply gentle pressure, Experiment with different fabrics and colors |
Brush Nib Care and Pressure Control
Proper care and maintenance of your brush nibs are crucial for achieving consistent and smooth brush calligraphy. By following a few simple steps, you can extend the life of your brush pens and ensure optimal performance.
Brush Nib Care
Firstly, it’s important to clean your brush nibs after each use. Rinse them with water to remove any excess ink, and gently reshape the bristles with your fingers or a soft cloth. Avoid using harsh solvents or excessive force, as these can damage the delicate bristles.
Additionally, store your brush pens with their caps on to prevent the bristles from drying out or becoming misshapen. Placing them upright in a pen holder or container will help maintain their shape and prevent any accidental bending or fraying.
Pressure Control
Controlling the pressure applied to the brush nib is essential for achieving consistent stroke widths in your lettering. Begin by practicing light and gradual pressure to create thin strokes, and gradually increase the pressure to achieve thicker lines.
Remember to be mindful of the pressure you apply throughout your lettering composition. Consistency is key, so try to maintain a steady pressure for a uniform look. Experiment with different pressure levels to create varying stroke widths and add visual interest to your brush calligraphy.
| Brush Nib Care Tips | Pressure Control Techniques |
|---|---|
| 1. Clean your brush nibs after each use to remove excess ink. | 1. Begin with light pressure to create thin strokes. |
| 2. Gently reshape the bristles with your fingers or a soft cloth. | 2. Gradually increase the pressure for thicker lines. |
| 3. Store brush pens with their caps on to prevent drying or misshaping. | 3. Be mindful of maintaining a steady pressure for consistent stroke widths. |
Proper brush nib care and pressure control are essential for achieving consistent and professional-looking brush calligraphy. Taking the time to clean and store your brush pens properly, as well as practicing pressure control techniques, will help you achieve the desired results in your lettering compositions.
Flourishing with Brush Pens

Flourishing is a beautiful and decorative technique that adds elegance and style to your brush calligraphy. With the right skills and practice, you can create stunning and artistic compositions that will impress your audience. In this section, we will explore intermediate flourishing techniques using brush pens.
One of the key elements of flourishing is the use of loops, curls, and swashes. These graceful and flowing strokes can be added to the beginning or end of letters to create an embellished look. By incorporating flourishing into your lettering, you can transform a simple word or phrase into a visually captivating piece of art.
To master flourishing, it’s important to understand the principles of balance and consistency. Each flourish should flow harmoniously with the rest of the lettering and maintain a consistent style throughout. Practice different variations of loops, curls, and swashes to find your own unique flourishing style.
Remember, flourishing is a way to express your creativity and add your personal touch to your brush calligraphy. Experiment with different shapes, sizes, and angles to create visually appealing compositions. With the right techniques and plenty of practice, you’ll be able to create beautiful and intricate flourishes that will elevate your brush calligraphy to new heights.
Example of Flourishing:
| Original Lettering | Flourished Lettering |
|---|---|
 |
https://www.youtube.com/watch?v=fESNUAUTgnQ |
“Flourishing is the perfect way to add a touch of elegance and sophistication to your brush calligraphy. The flowing strokes and decorative elements create a sense of movement and beauty that will captivate your audience. Don’t be afraid to experiment and let your creativity shine through!”
Brush Calligraphy Projects and Creative Ideas
Now that you have mastered intermediate lettering styles, brush pen techniques, and other advanced skills in brush calligraphy, it’s time to explore a variety of exciting projects and creative ideas. Whether you’re looking to showcase your artistic talent or create personalized gifts, brush calligraphy offers endless possibilities for creative expression.
Wall Art and Home Décor
Transform your living space with beautiful brush calligraphy wall art and home decor. Create inspirational quotes, personalized family names, or intricate designs to adorn your walls. Experiment with different styles and colors to achieve a look that complements your home’s aesthetic. You can also try your hand at creating brush calligraphy on canvases or wooden boards to add a unique touch to your decor.
Greeting Cards and Stationery
Make a lasting impression with personalized greeting cards and stationery. Use your brush calligraphy skills to create custom birthday cards, wedding invitations, thank-you notes, and more. Experiment with different cardstocks, colors, and embellishments to make each piece truly unique. Your hand-lettered creations will be cherished by friends, family, and recipients alike.
Logo Design and Branding
Bring your design skills to the professional realm by offering logo design and branding services. With brush calligraphy, you can create visually stunning logos that capture the essence of a brand. Use your expertise to incorporate calligraphic elements into business cards, marketing materials, and social media graphics. Your unique and artistic approach will help businesses stand out from the competition.
So, go ahead and explore these brush calligraphy projects and creative ideas. Let your imagination run wild as you combine different styles and techniques to create beautiful and eye-catching artwork. Remember, the possibilities are endless, and the only limit is your creativity.
Conclusion
Congratulations on completing the Brush Calligraphy for Intermediates course! You’ve taken your brush calligraphy skills to the next level and expanded your creative possibilities. Throughout the course, you’ve learned various intermediate lettering styles, brush pen techniques, and advanced concepts such as color blending and calligraphic shading.
By practicing these techniques and experimenting with different styles, you’ll continue to refine your brush calligraphy skills and create stunning compositions. Remember to maintain proper brush nib care and pressure control to achieve consistent and smooth strokes.
With your newfound knowledge, you can now create beautiful brush calligraphy on various surfaces and incorporate flourishing to add elegance to your lettering. Let your creativity soar as you explore a wide range of brush calligraphy projects and creative ideas, from wall art and greeting cards to logos and marketing materials.
Keep honing your skills, and don’t be afraid to push the boundaries of your artistic expression. Brush calligraphy is a continuous journey of learning and growth, and with the skills you’ve acquired in this course, you’re well-equipped to embrace that journey. Congratulations once again on completing the Brush Calligraphy for Intermediates course!
FAQ
How will the Brush Calligraphy for Intermediates course improve my skills?
The course will teach you advanced techniques and intermediate lettering styles, allowing you to create stunning brush calligraphy compositions and achieve stroke weight variation.
What will I learn in the Brush Pen Techniques for Intermediate Calligraphers section?
You will learn stroke weight variation techniques and brush calligraphy composition, which will help you create more dynamic and engaging brush calligraphy projects.
How will the Color Blending in Brush Calligraphy section benefit my artwork?
By learning how to blend colors seamlessly using brush pens, you can add vibrancy and eye-catching effects to your brush calligraphy projects.
What will I gain from mastering Calligraphic Shading?
Calligraphic shading adds depth and dimension to your brush calligraphy, enhancing the overall composition and creating a three-dimensional effect.
Can I create brush calligraphy on surfaces other than paper?
Yes, in the Brush Calligraphy on Different Surfaces section, you will learn how to create brush calligraphy on wood, glass, fabric, and more, expanding your artistic possibilities.
Why is proper care and maintenance of brush nibs important?
Proper care and maintenance ensure consistent and smooth brush calligraphy. You will also learn techniques for controlling pressure, which affects stroke thickness and thinness.
How will learning flourishing with brush pens enhance my brush calligraphy?
Incorporating intermediate flourishing techniques, such as loops, curls, and swashes, adds elegance and style to your lettering, creating stunning and artistic compositions.
What kind of projects and ideas will I explore in the Brush Calligraphy Projects and Creative Ideas section?
You will discover a range of brush calligraphy projects, including wall art, greeting cards, logos, and marketing materials, providing endless possibilities for your creative endeavors.


