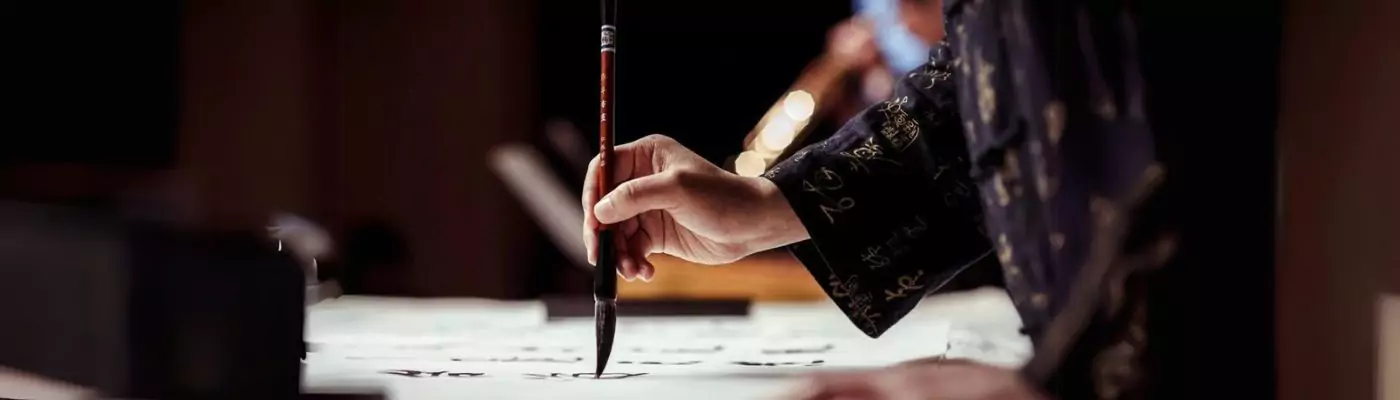

Calligraphy Practice for Script Joining: Master the Art of Seamless Writing Today!
Welcome to the world of calligraphy! If you’ve always admired the beautiful art of script joining but thought it was too difficult to master, think again. With some practice and the right techniques, you can achieve seamless writing that resembles calligraphy without spending years perfecting your skills. In this article, we’ll explore various methods and tools to help you improve your script join letters and create stunning calligraphy. Let’s get started!
Key Takeaways:
- Calligraphy Practice for Script Joining allows you to create the look of calligraphy without advanced skills.
- Fake Calligraphy involves adding width to downstrokes in your regular cursive writing.
- Any pen that allows you to thicken lines can be used for faux calligraphy.
- Practicing with worksheets can help improve your script join techniques.
- Start your calligraphy journey with the right tools, including calligraphy pens, nibs, inks, paper, and guideline sheets.
Choosing the Right Tools for Calligraphy Practice
When starting your calligraphy practice, it’s important to have the right tools. Here are the essential tools you’ll need:
- Calligraphy Pens: Choose from a variety of options such as dip pens, fountain pens, or brush pens. Each type of pen provides a different writing experience and allows for versatility in creating various lettering styles.
- Calligraphy Nibs: Nibs are the metal tips that attach to dip pens. They come in different shapes and sizes, allowing for different line thicknesses and styles. For beginners, recommended options include the Nikko G or Zebra G nibs.
- Calligraphy Inks: Inks are available in various colors and consistencies. Water-based inks, such as Higgins Eternal or Winsor & Newton calligraphy ink, are a great choice for beginners. They offer smooth flow and are easy to work with.
- Calligraphy Paper: Use specialized calligraphy paper, such as Rhodia or Strathmore’s calligraphy paper pad, to ensure optimal results. These papers are designed to prevent ink bleeding and feathering, allowing your letters to appear crisp and clear.
- Calligraphy Guideline Sheets: Guideline sheets with pre-printed lines are beneficial for beginners. They provide a structure to guide your writing, ensuring consistent letter heights and spacing. You can easily find printable or pre-made guideline sheets online or in calligraphy practice books.
Experimenting with different tools is essential to finding the perfect combination that suits your calligraphy practice. Remember, each tool offers its own unique feel and style. Don’t be afraid to try different pens, nibs, inks, papers, and guideline sheets until you discover your favorite combination.
Having the right tools at hand sets the foundation for creating beautiful calligraphy. Let’s move on to the next section and learn about practicing basic strokes and shapes in calligraphy.
Practicing Basic Strokes and Shapes in Calligraphy

Mastering the basic strokes and shapes is essential to create beautiful lettering in calligraphy. These fundamental strokes include the upstroke, downstroke, underturn, overturn, and oval. By understanding and practicing these strokes, you’ll be able to develop consistency and control in your calligraphy work.
When practicing calligraphy, it’s important to hold the pen correctly at a 45-degree angle and apply the right amount of pressure. This allows you to achieve the desired variations in line thickness, with thicker lines on the downstrokes and thinner lines on the upstrokes.
To help you visualize and understand these basic strokes, let’s take a closer look at each one:
- Upstroke: This stroke is executed by moving the pen in an upward direction while maintaining a light pressure. It creates the thinner lines in calligraphy.
- Downstroke: The downstroke involves moving the pen in a downward direction with slightly more pressure, resulting in thicker lines.
- Underturn: This stroke consists of a curved line that starts with a thin upstroke and smoothly transitions into a thick downstroke.
- Overturn: The overturn is the opposite of the underturn, starting with a thick downstroke and transitioning into a thin upstroke with a curved line.
- Oval: The oval stroke is a rounded shape that combines both thin upstrokes and thick downstrokes, creating a harmonious and flowing curve.
Practicing these basic strokes and shapes is crucial for building a strong foundation in calligraphy. It allows you to master the control of the pen, the variation in line thickness, and create consistent and visually pleasing letterforms.
Take your time to practice each stroke individually, focusing on achieving smooth and even lines. Start with basic drills and gradually move on to more complex letterforms once you feel comfortable.
Understanding Letter Forms and Anatomy in Calligraphy

To create beautiful calligraphy examples, it’s important to understand the structure and anatomy of letters. Familiarizing yourself with calligraphy letter forms and their components will help you achieve well-formed and visually pleasing lettering.
In calligraphy, certain terms like baseline, x-height, ascender, and descender play a crucial role in determining the proportions and appearance of each letter. Let’s take a closer look at these key elements:
| Term | Description |
|---|---|
| Baseline | The imaginary line upon which most letters sit. |
| X-Height | The height of lowercase letters, typically measured from the baseline to the top of the x. |
| Ascender | The part of a letter that extends above the x-height, such as the top part of h or d. |
| Descender | The part of a letter that extends below the baseline, such as the tail of j or p. |
Understanding the importance of these terms will guide you in creating well-proportioned and balanced letters in your calligraphy. Breaking down letters into individual strokes is another useful strategy to form each letter correctly.
When practicing calligraphy, it’s essential to pay attention to the spacing between letters and words. Consistency and uniformity are key for legibility and aesthetic appeal in your work.
By studying the anatomy of letters and practicing their formation, you’ll develop the skills needed to create beautiful calligraphy examples that showcase your understanding of letter forms and their proportions.
Exploring Different Calligraphy Styles

Calligraphy offers a wide range of styles to explore, each with its unique characteristics. By experimenting with different calligraphy styles, you can find the one that resonates with you the most. Let’s take a closer look at some popular calligraphy styles: Copperplate, Spencerian, and Modern calligraphy.
Copperplate Calligraphy
Copperplate calligraphy is known for its formal and elegant appearance. It originated in the 16th century and features precise penmanship, thin hairlines, and thick downstrokes. This style requires careful attention to detail and a confident hand.
Spencerian Calligraphy
Spencerian calligraphy is characterized by its flowing and intricate loops. Developed by Platt Rogers Spencer in the 19th century, this style focuses on fluid movements and graceful curves. Spencerian calligraphy requires practice and patience to achieve its distinctive look.
Modern Calligraphy
Modern calligraphy is a more contemporary approach to lettering. It allows for greater creativity and individuality, with an emphasis on personal expression. Modern calligraphy can be playful, experimental, and versatile, incorporating various lettering techniques and flourishes.
Exploring these different calligraphy styles not only broadens your artistic repertoire, but it also helps you develop your own unique approach to creating beautiful calligraphy examples. Whether you prefer the formal elegance of Copperplate, the flowing loops of Spencerian, or the creative freedom of Modern calligraphy, there is a style out there that will inspire and resonate with you.
“Calligraphy styles are like languages. Each one has its own voice and personality. By exploring different styles, you can find the one that speaks to your creative spirit.” – Katherine Lam, Calligraphy Artist
Now that we’ve explored various calligraphy styles, let’s move on to the next section to learn how to develop your unique calligraphy style.
Developing Your Unique Calligraphy Style

Developing your own unique calligraphy style is an exciting process that allows you to express your creativity and add a personal touch to your work. As you continue to explore the world of calligraphy, here are some tips to help you develop a style that is distinctly yours:
Experiment with Different Styles and Techniques
Don’t be afraid to step out of your comfort zone and try new calligraphy styles. Experiment with different letter shapes, sizes, and spacing to find what appeals to you. Whether it’s the graceful loops of Copperplate, the flowing elegance of Spencerian, or the modern and edgy feel of Modern calligraphy, each style offers unique possibilities for creative expression.
Add Personal Flourishes and Decorations
One way to make your calligraphy style stand out is by incorporating personal flourishes and decorations. These decorative elements can add a touch of flair to your lettering, making it truly one-of-a-kind. Experiment with adding swirls, curls, or unique embellishments that reflect your personality and artistic vision.
Embrace Unconventional Calligraphy Approaches
While it’s important to learn and master the traditional techniques of calligraphy, don’t be afraid to break the rules and explore unconventional approaches. Infuse your calligraphy with unexpected color combinations, non-traditional materials, or innovative design elements. This will set your work apart and give it a fresh and distinctive look.
Seek Inspiration from Various Sources
Inspiration can be found everywhere, from nature to architecture, to art and typography. Explore different sources of inspiration to feed your creativity and fuel your unique calligraphy style. Look at the work of other calligraphers, study different art forms, and immerse yourself in diverse cultural influences. This exposure will help you develop a broader perspective and find your own artistic voice.
Practice, Practice, Practice
Consistent practice is vital to developing your unique calligraphy style. Dedicate time to honing your skills, experimenting with different techniques, and refining your letterforms. Regularly practicing will not only improve your technical abilities but also allow your personal style to evolve and develop over time.
By embracing experimentation, incorporating personal touches, exploring unconventional approaches, seeking inspiration from various sources, and practicing regularly, you’ll be well on your way to developing a calligraphy style that is uniquely yours. So, let your creativity flow, and let your calligraphy become a reflection of your artistic journey.
Perfecting Calligraphy on Different Surfaces
Once you’ve mastered the basics of calligraphy, it’s time to move on to perfecting your lettering skills on different surfaces. Enhancing your artistic expression and creating decorative art becomes possible by exploring the versatility of calligraphy on various materials. Let’s take a closer look at a few surfaces that provide unique opportunities for calligraphy projects:
Wood
Calligraphy on wood offers a rustic and natural appeal. Whether you’re working on wooden signs, home decor, or personalized gifts, there are specific techniques to ensure your lettering stands out. Acrylic paint or paint pens work well for adding crisp lettering to wood surfaces. The smooth consistency and vibrant colors of acrylics deliver exceptional results. Consider using standout fonts and flourishes to highlight the wood’s texture and create eye-catching designs.
Chalkboard
Chalkboards provide a classic yet versatile canvas for calligraphy. Whether it’s a menu board, event signage, or home decor, calligraphy on chalkboards offers a charming and nostalgic touch. Chalk markers or traditional chalk can be used to create beautiful lettering with varying thickness and style. The smooth texture of chalkboards allows for easy erasing and adjustments, giving you the freedom to experiment and perfect your designs.
Fabric
Infusing calligraphy into fabric projects adds a personalized and artistic touch to clothing, home decor, and handmade gifts. Fabric markers or fabric paint offer excellent precision and vibrant colors on textiles. Calligraphy on fabric can be used to embellish pillowcases, tote bags, t-shirts, or even create customized handkerchiefs. Consider using contrasting colors and different font styles to create striking and unique designs on fabric.
Glass and Ceramics
Calligraphy on glass and ceramics brings elegance and sophistication to special occasions, home decor, and personalized gifts. Whether it’s glassware, china, or vases, using oil-based paint pens or permanent markers provides the durability and longevity needed for these surfaces. Delicate flourishes and intricate lettering can transform ordinary glass or ceramics into stunning pieces of art.
Perfecting calligraphy on various surfaces requires patience, practice, and an understanding of the specific tools and techniques required. Experimenting and honing your skills on wood, chalkboard, fabric, and glass/ceramics will help you develop your unique style and enhance your calligraphy journey.
Continue reading to explore how the culmination of your calligraphy journey leads to the final section of this article, where we delve into the importance of developing your unique calligraphy style.
Conclusion
Embarking on the calligraphy journey is a transformative experience that allows you to harness the power of artistic expression and master the captivating art of calligraphy. Through dedication and practice, you can unlock your creative potential and create stunning works of calligraphy that reflect your unique style and vision.
As you begin your calligraphy journey, it is crucial to start with the right tools. Choose high-quality calligraphy pens, nibs, inks, and paper that suit your preferences and enhance your practice. By investing in the right tools, you set yourself up for success and ensure that your learning process is smooth and enjoyable.
By mastering the basic strokes and shapes of calligraphy, you lay a firm foundation for your artistic development. Consistency and precision in your strokes will bring life to your lettering and enable you to create intricate and breathtaking calligraphy pieces.
As you progress, explore different calligraphy styles such as Copperplate, Spencerian, and Modern calligraphy. Experiment with various techniques and find the one that resonates with you the most. Cultivate your unique calligraphy style that reflects your personality and allows you to convey your artistic expression authentically.
Furthermore, don’t limit your artistic expression to traditional surfaces. Explore writing on wood, chalkboards, fabric, and glass/ceramics to expand the horizons of your calligraphy practice. Each surface presents its own challenges and opportunities, allowing you to create stunning calligraphy art pieces that captivate and inspire.
Remember, the calligraphy journey is a lifelong endeavor. Embrace the continuous learning process and commit to regular practice to master calligraphy. With time, patience, and dedication, you will witness your calligraphy skills flourish and evolve, and your artistic expression will soar to new heights.
FAQ
What is Fake Calligraphy or Faux Calligraphy?
Fake Calligraphy, also known as Faux Calligraphy, is a technique that allows you to create the look of calligraphy without advanced skills. It involves adding width to downstrokes in your regular cursive writing.
What pens can I use for faux calligraphy?
Any pen that allows you to thicken the lines can be used for faux calligraphy. Examples include Sakura Moonlight Gelly Roll Pens or Crayola markers.
What are some essential tools for calligraphy practice?
Essential tools for calligraphy include calligraphy pens (dip pens, fountain pens, or brush pens), nibs (metal tips), inks (such as Higgins Eternal or Winsor & Newton calligraphy ink), calligraphy paper, and guideline sheets.
How can I improve my calligraphy skills?
Practicing basic strokes and shapes, understanding letter forms and anatomy, exploring different calligraphy styles, and developing your unique style are all ways to improve your calligraphy skills. Regular practice and experimentation are key.
What are some popular calligraphy styles?
Some popular calligraphy styles include Copperplate, Spencerian, and Modern calligraphy. Each style has its own unique characteristics and appeal.
How can I develop my own unique calligraphy style?
To develop your own unique calligraphy style, experiment with different styles, letter shapes, and spacing. Incorporate personal touches like flourishes, decorations, and unconventional color combinations to make your work stand out.
Can I use calligraphy on different surfaces?
Yes, you can use calligraphy on different surfaces such as wood, chalkboards, fabric, and glass/ceramics. Each surface may require specific tools and techniques.
How do I master calligraphy?
Mastering calligraphy is a continuous learning process that requires dedication and practice. By starting with the right tools, practicing basic strokes and shapes, exploring different styles, and perfecting your skills on various surfaces, you can gradually master the art of calligraphy.


