
Calligraphy Correction Tools: Discover How to Erase Mistakes Effortlessly
Calligraphy mistakes happen to the best of us, but luckily, there are effective tools available to help you correct them. Whether you’re a seasoned calligrapher or just starting out, having the right calligraphy correction tools is essential for a seamless writing experience. From pens and inks to markers and erasers, we’ll explore the best tools and techniques to help you fix mistakes with ease and precision.
When it comes to calligraphy, the type of tools you use can make a significant difference in your corrections. Factors such as the type of ink, paper surface, and quality of correction materials can all impact the success of your corrections. That’s why it’s important to choose the right tools for the job.
Key Takeaways:
- Choose the right calligraphy correction tools for effective and precise corrections.
- Factors such as ink type, paper surface, and the quality of correction materials can impact the success of corrections.
- Explore different techniques like using scratch nibs, gouache paint, and changing incorrect letters to fix calligraphy mistakes.
- Prevent mistakes by creating an optimal work environment and double-checking your work before finalizing it.
- Invest in essential hand lettering tools to enhance your calligraphy experience.
Types of Correction Tools

When it comes to calligraphy mistakes, having the right tools can make all the difference in achieving flawless results. Here are some essential calligraphy correction tools you should have in your toolkit:
| Tool | Description |
|---|---|
| Dip Pen and Nib | A dip pen and nib allow for precise lettering and easy ink flow. |
| Your Favorite Ink | Choose an ink that suits your style and provides good coverage. |
| Paper Samples | Having different paper samples allows you to test corrections before applying them to your final piece. |
| Scratch Pen Nib | A scratch pen nib is perfect for scraping off small mistakes or ink blots. |
| Gouache Paint | Gouache paint in primary colors, along with white and black, is excellent for blending and matching colors. |
| Small Round Sable or Synthetic Brush | Use a small round brush for precise corrections and blending. |
| Soft Brush | A soft brush helps remove any dislodged ink bits after corrections. |
| Mixing Palette | A mixing palette is essential for blending and creating custom colors. |
| Soft Chinese Hake Brushes | Soft Chinese hake brushes are useful for various correction techniques. |
| Pointed Scratch Nibs | Pointed scratch nibs can help with different correction methods. |
Having high-quality brushes and a durable palette is also important for effective corrections.
Now that you know the essential calligraphy correction tools, let’s explore some specific techniques for correcting mistakes in the next sections.
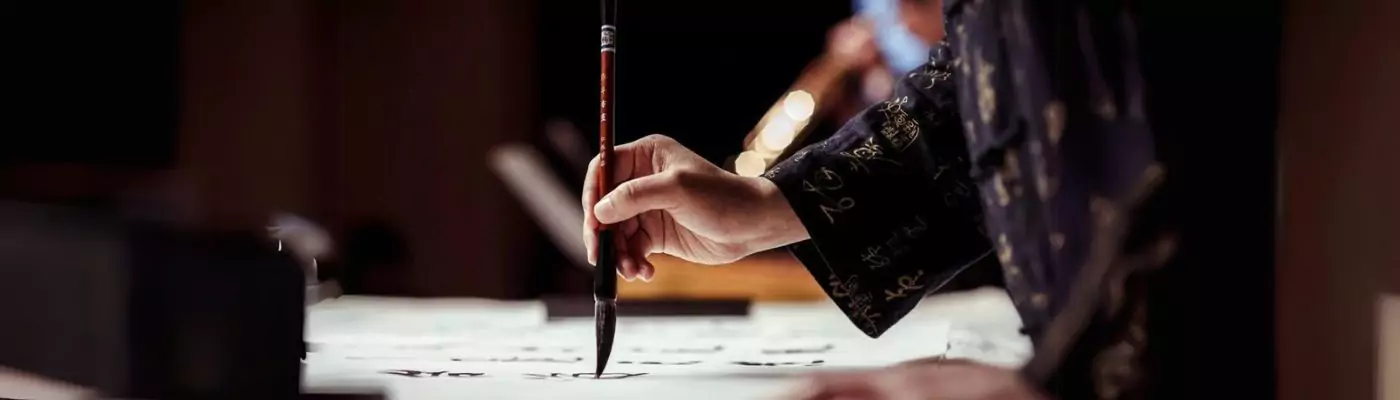
**Note**: The image illustrates a variety of calligraphy correction tools, including dip pens, inks, brushes, and scratch nibs.
Softening Corrections with a Scratch Nib

The scratch nib is a versatile tool that can be used for scraping off errors and ink blots in calligraphy. It provides a delicate touch, allowing you to make precise corrections without damaging the paper surface. To achieve optimal results, it’s important to hold the scratch nib at an oblique angle and apply gentle pressure to the paper.
When using the scratch nib, keep in mind that the effectiveness of this method depends on the type of ink and paper you are working with. Different inks and papers may require slight adjustments in technique. Additionally, the level of skill and control you possess in handling the correction tool will influence the quality of your corrections.
After using the scratch nib, it’s essential to remove any dislodged ink bits from the paper. A soft brush can be used to gently sweep away the remnants, ensuring a clean and polished result.
Remember: The scratch nib is a valuable tool in your arsenal of calligraphy correction tools. With its precision and finesse, it allows you to soften errors and create flawless calligraphy masterpieces.
Painting Over Errors with Gouache

When it comes to calligraphy, mistakes happen. But don’t worry! You can easily correct those errors with the right tools and techniques. If scraping off errors proves to be challenging, painting over them with gouache is a fantastic correction method. Gouache is a versatile, opaque, water-based paint that can be mixed to match the color of your paper.
To correct your calligraphy mistakes using gouache, follow these steps:
- Prepare the paint: Squeeze out small amounts of primary gouache colors (red, blue, yellow) onto your mixing palette. Add white and black as needed to achieve the perfect shade that matches your paper color. Remember to test the color on paper samples before applying it to your actual artwork.
- Apply in layers: Use a small, round brush to apply the gouache in thin layers. Start with a light application and gradually build up the color until the mistake is fully covered. This helps ensure a seamless blend with the surrounding calligraphy.
- Use a damp brush: Keep a separate brush damp to gently blend the edges of the painted area. This will help create a smoother transition between the corrected area and the rest of your writing.
Note: When using gouache for calligraphy corrections, be mindful of the type of ink you used and the surface texture of your paper. Non-waterproof inks and papers with smooth surfaces may require additional precautions to prevent smudging or bleeding.
Gouache is a versatile medium that allows you to correct errors while maintaining the integrity and beauty of your calligraphy. With a little practice and experimentation, you’ll be able to fix mistakes effortlessly. So, embrace the power of gouache paint and confidently create flawless calligraphy artwork!
Changing Incorrect Letters

Sometimes, when it comes to calligraphy, mistakes happen. But don’t worry! You can easily change an incorrect letter to the right one without the need for extensive correction techniques. This method works especially well with constructed lettering styles and consistent pen angles.
For example, let’s say you accidentally wrote a lowercase “c” instead of an “a”, “e”, “d”, or “g”. No problem! You can simply add or blend strokes together to transform the incorrect letter into the right one. The key is to ensure that the final result is seamless and invisible, so it seamlessly integrates with the rest of your calligraphy.
This method allows you to fix mistakes quickly and effortlessly, preserving the overall aesthetic of your calligraphy artwork. Now, let’s take a look at an example:
| Incorrect Letter | Corrected Letter |
|---|---|
As you can see in the table above, with a few simple strokes, the incorrect “c” has been transformed into the correct “a”, “e”, “d”, or “g”. By mastering this technique, you can confidently correct any incorrect letters in your calligraphy, ensuring a polished and professional final result.
Tips to Avoid Mistakes
Prevention is always better than correction. To avoid calligraphy mistakes, follow these tips:
- Create an optimal work environment: Find a quiet and well-lit space where you can focus on your calligraphy without distractions.
- Use scrap paper for masking: Before working on your final copy, practice on scrap paper to test different strokes, letter forms, and ink flow.
- Avoid lettering when tired: Fatigue can lead to sloppy and inconsistent lettering. Take breaks and work on calligraphy when you’re feeling refreshed and focused.
- Keep food and beverages away from your work area: Accidental spills can ruin your calligraphy work. Keep your workspace clean and free from potential hazards.
- Double-check spelling: Mistakes in spelling can be glaring and difficult to correct. Proofread your content multiple times before committing it to paper.
- Test papers, inks, and tools: Before starting your final project, experiment with different papers, inks, and tools to find the ones that work best for you.
- Establish a proper order of execution: Plan your work process from lettering to gilding to painting. This helps minimize mistakes and makes corrections easier if needed.
By following these tips, you’ll be able to avoid common calligraphy mistakes and create beautiful, error-free pieces.
Remember:
“Prevention is always better than correction.”
Essential Tools for Hand Lettering
Alongside calligraphy correction tools, there are essential tools for hand lettering that every artist should have in their toolkit. These tools are necessary for sketching, erasing, and inking, providing artists with a solid foundation for their hand lettering work.
Pencil
A high-quality pencil is a must-have tool for hand lettering. It allows you to sketch out your letterforms and experiment with different styles before committing to ink. Look for pencils with soft lead that can create smooth lines and are easy to erase if needed.
Eraser
Having a reliable eraser is essential for correcting mistakes and refining your lettering. Choose a white eraser or an eraser pen, which can provide precise erasing and help you achieve cleaner lines.
Paper
Good quality paper is crucial for hand lettering as it affects the ink flow and the overall appearance of your lettering. Opt for smooth, heavyweight papers that can handle ink without bleeding or feathering. Canson XL Mix Media and Rhodia No.16 are excellent choices for hand lettering projects.
Ruler
A ruler is a handy tool for creating straight lines and maintaining consistent spacing between letters. It helps you achieve precision and professionalism in your hand lettering work.
Ink Pens
Ink pens are the main tools for inking your hand lettering. There are various options available, but Copic Multiliner SP Black Ink Marker and Sakura 30062 Pigma are popular choices among artists. These pens provide smooth and consistent ink flow, allowing you to create crisp and precise lines.
| Tool | Recommended Brands |
|---|---|
| Pencil | Faber-Castell, Staedtler, Tombow |
| Eraser | Mono Eraser, Tombow MONO Zero Eraser Pen |
| Paper | Canson XL Mix Media, Rhodia No.16 |
| Ruler | Westcott, Alumicolor |
| Ink Pens | Copic Multiliner SP, Sakura Pigma |
Having these essential tools in your arsenal will empower you to create stunning hand lettering pieces with ease. Remember to experiment, practice, and explore your own unique style to unleash your creativity.
Stay tuned for the next section, where we will explore effective techniques for calligraphy correction using these essential tools.
Conclusion
Calligraphy correction tools are essential for achieving flawless hand lettering. By utilizing the right tools and techniques, you can easily fix mistakes and create beautiful calligraphy artwork. It is important to choose the appropriate correction method based on the type of mistake and materials used to ensure seamless corrections that blend seamlessly with the rest of your work.
Remember, practice and experimentation are key to mastering calligraphy. With the right tools in hand, you can enjoy the journey of honing your skills and creating stunning lettering pieces. So make sure to equip yourself with the best calligraphy correction tools and embrace the world of elegant and captivating lettering.
FAQ
What are calligraphy correction tools?
Calligraphy correction tools are tools that help correct mistakes made during calligraphy writing. They include items such as scratch nibs, gouache paint, and erasers.
What are some essential calligraphy correction tools?
Some essential calligraphy correction tools include dip pens and nibs, ink, paper samples, scratch pen nibs, gouache paint, small round brushes, soft brushes, and a mixing palette.
How do I use a scratch nib for calligraphy corrections?
To use a scratch nib for calligraphy corrections, hold it at an oblique angle and gently scrape off errors or ink blots on the paper surface. Use a soft brush to brush away any dislodged ink bits.
Can I paint over calligraphy mistakes with gouache?
Yes, you can paint over calligraphy mistakes with gouache. Gouache paint is opaque and can be mixed to match the color of the paper. Apply the paint in layers using a small, round brush.
Is it possible to change incorrect letters in calligraphy?
Yes, it is possible to change incorrect letters in calligraphy. This method works best with constructed lettering styles and consistent pen angles. It involves adding or blending strokes together to create the correct letter.
How can I avoid calligraphy mistakes?
To avoid calligraphy mistakes, create an optimal work environment, use scrap paper for masking, avoid lettering when tired, keep food and beverages away from your work area, and double-check spelling. Testing materials before starting a final copy is also important.
What are some essential tools for hand lettering?
Some essential tools for hand lettering are a high-quality pencil, eraser, good quality paper, ruler, and ink pens. These tools are necessary for sketching, erasing, and inking.
Do calligraphy correction tools make the journey of learning calligraphy more enjoyable?
Yes, having the right calligraphy correction tools can make learning calligraphy more enjoyable and help you fix mistakes with ease, allowing you to create flawless calligraphy artwork.


